 Over time, your beautiful hardwood flooring can end up looking drab and dull. After years of your kids running around the house in sneakers or soccer cleats, pets chasing after chew toys in the house, and pieces of furniture being moved from room to room, your floors can end up looking old and worn out. And if you’re thinking of selling your house, your scratched-up floors could decrease the value of your house.
So, what should you do? Thankfully, with most wood floors, you can bring them back to their original condition by refinishing them. The first step in the refinishing process involves sanding. (In this blog post, we’ll be covering sanding and not the other steps, such as staining the floor and adding coats of finish.)
How long does it take to sand hardwood floors?
On average, sanding usually takes around 2-3 hours.
DIY or hire someone?
The first question to ask yourself is if you want to take a DIY approach or hire a professional to refinish your floors. You should consider your skill level, how much time you have to dedicate to the project, and how much it will cost. If you refinish your floors by yourself, it might not come out as well as you hoped, especially since the equipment you rent or buy usually won’t be as high quality as a professional’s.
If you’re going to do it yourself, you should also make sure you have all the proper safety equipment, such as goggles, gloves, kneepads, protective rubber shoes, hearing protection, and a respirator or dust mask.
If you DIY and the sanding is done poorly, the finish won’t last as long and you’ll have to redo the process again sooner. Ultimately, doing it yourself can end up costing more than hiring a professional.
What tools and materials are needed to sand floors?
Here are some of the tools needed to sand hardwood floors:
- dust mask
- hammer
- nail set
- paint scraper
- tape measure
- wood chisel
- pry bar
- pliers
- stiff, wide-blade putty knife
- utility knife
- flat-head screwdriver
- power floor sander
- edge sander
- power floor buffer
- industrial-grade vacuum cleaner
- box fan
- plastic sheeting
- painter’s tape
- safety glasses
- work gloves
- breathing protection
- hearing protection
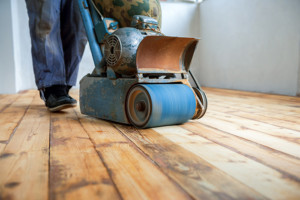
The type of sander you should use depends on the type of floor you have. If you have flat floors, you should use a random orbital sander. For cupped or wavy floors, use a drum sander.
What’s involved in the sanding process?
 First, you should prep the sanding area.
- Clear the room of all furniture, doors, drapes, and other décor.
- Clean the floor with a hardwood flooring cleaner
- Tape plastic over air ducts to keep sanding dust out.
- Nail down loose boards with finish nails.
- Prep the perimeter of the room and any nooks that the buffer won’t reach.
- After preparing the room, it’s time to sand. Sanding takes three sessions with progressively lighter grit sandpaper.
- First pass: a coarse 30-40 grit
- Second pass: a medium 50-60 grit
- Third pass: a fine 80-100 grit
Here are the steps for each session:
Session 1:
- Attach the 30-40 grit sandpaper to your sander.
- Start in the farthest corner from the door.
- Start sanding, and work in in 2″ x 4″ sections.
- Move in a straight path along the same direction as the boards.
- When you’re ready to begin sanding another row, overlap the previous row by one plank.
- Get as close to the edges as possible.
- By keeping the sander in motion at all times, you’ll avoid wearing dents or grooves in the wood.
- After sanding the room’s center, bring out the edge sander (loaded with 30-40 grit sandpaper) to sand the corners. Use a semicircular motion to avoid gouging the wood. The edge sander should overlap the area you just sanded to make it blend in well.
- Vacuum thoroughly with a brush attachment, examine the floor, and fill any gouges or holes with matching wood filler.
Session 2:
- For this second pass, make light pencil marks along the edges of the room to keep track where you sand. (You’ll see where you’ve sanded as you sand away the marks.)
- Load your random orbital and hand sanders with medium, 50-60 grit sandpaper.
- Repeat the sanding procedure to remove blemishes and scratches. Start at the opposite side of the room from where you started sanding the first time.
- Vacuum the room with a brush attachment.
Session 3:
- Load the sanders with a fine 80-100 grit sandpaper. This will create a smooth surface.
- Follow the same process as the first and second pass.
Screen the floor:
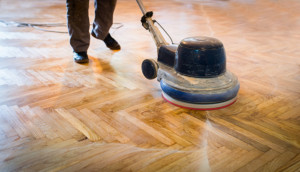
After the final sanding, run a buffer equipped with 120- or 150-grit sanding screen to smooth out fine scratches. Work along the grain and get as close to the wall as possible. For the room’s edges and corners, use a sanding screen on an extension pole.
Cleaning:
Use an industrial-grade vacuum to remove fine dust particles from the floor. Use a damp rag to wipe away excess dust from walls, windowsills, and fans. Dust could cause rough spots if it gets into your sealant, so be as thorough as you can.
Why M Craft is the best floor sanding company to hire
M Craft hardwood flooring services range from refinishing and sanding to new installations in and around Chicago. Our team of skilled craftsmen can also help create unique and custom accents to fit the personality of your home.
M Craft isn’t interested in simply completing a job and moving on to the next. We work hard to build trusting relationships with our clients and execute every job with the hopes of working together again in the future. We’ve built our company with a simple mission: deliver an outstanding product with superb service while respecting customers and demonstrating a hardworking, professional attitude at all times.
When we come in to do a free estimate, we’ll look at what you have and talk about what you want. Then, we’ll discuss options at varying price points to accomplish the job within your desired timeline.


